

Why Accessibility in Tech is Vitally Important
Accessibility DesignA well-designed and thoughtful app experience makes people happy. Happy people make for loyal customers. The more loyal customers your application has, the happier...
In Part One of our series, we got familiar with the iOS VoiceOver rotor. Next up, we’re going to take a look at how to implement a custom rotor to our VoiceOver.
If you’re looking to add accessibility to an existing application the best way to get started is to perform an audit on the current app. There are many tools available to help with this process but for the purposes of this blog post, we’re going to lean towards a basic manual approach.
You can get a sense of how accessible your app is by enabling VoiceOver on your device and running through your application as a user. While you could wear a blindfold or close your eyes, you’ll probably want to use the screen curtain feature instead. When on, the screen is blacked out. Once you have VoiceOver on, the easiest way to toggle screen-curtain is by using the three-finger triple-tap gesture.
Take note of how the app reacts to different rotor navigation options, what it says when focusing on images, links, buttons, etc. Pay special attention to how and whether UI changes are announced: when a notification pops up or a long-running task completes is this communicated via VoiceOver?
With VoiceOver, you should be able to access all functional elements on the screen, and the focus order should be sequential. Keep an eye on that focus order: some UI elements might become focused out of order when using accessibility out of the box, and you might even inadvertently create a “focus trap,” where next/previous migration gets stuck in a small portion of the UI. These issues are generally easy to fix, and they’re a huge win for users!
Using Apple applications as a test is a great way to get familiar with some standards and how VoiceOver should flow before testing your own application.
To get started with VoiceOver accessibility implementation the best place to begin is by taking a look at the UIAccessibility documentation. Here you’ll find all of the settings available for your UI components. There are a lot of options there but some of the most commonly used ones are outlined below:
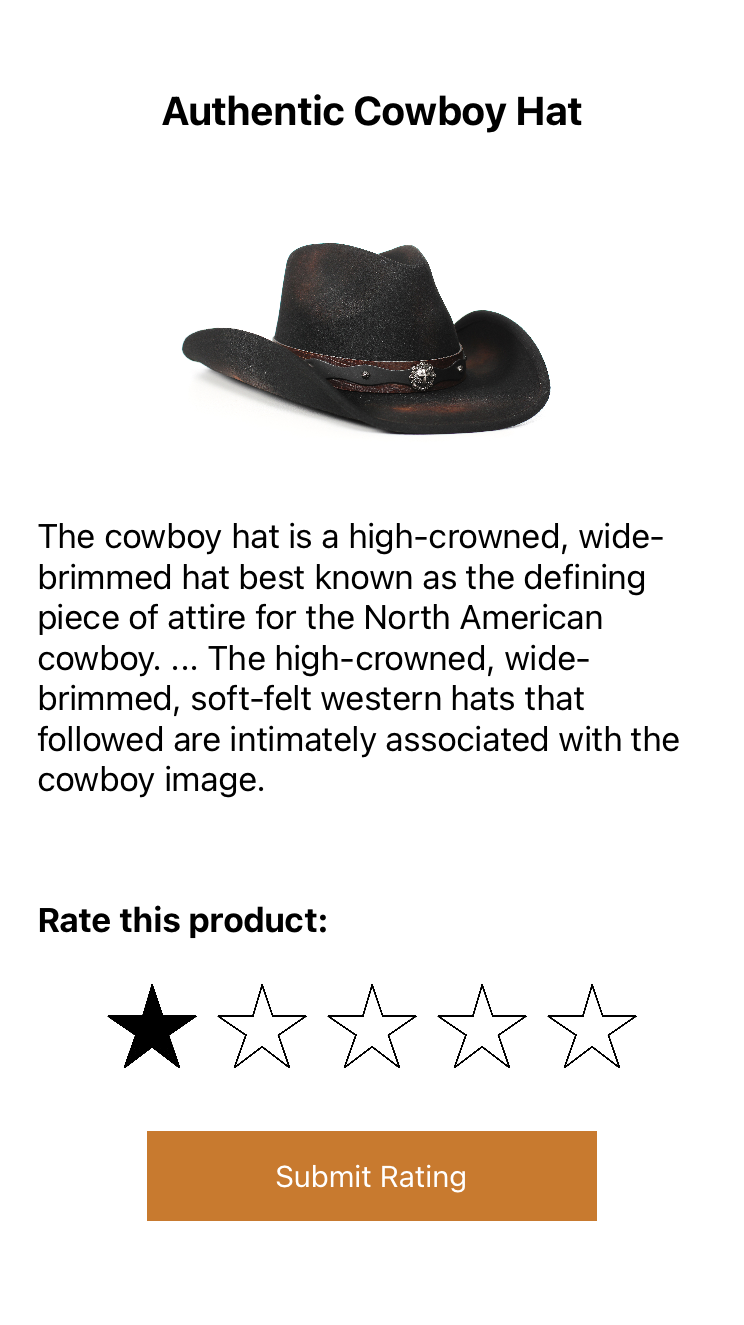 Let’s work through an example starting with a simple rating app. The screenshot above shows a single-page application with a title, image, description, rating, and submit button. The idea here is that the user is able to rate the item shown in the picture. Out of the box, VoiceOver focuses on the labels and buttons which are read out loud and provide some context to the user, but not everything is focusable. As you can see, both the image and the rating control are skipped over completely.
The accessibility API provides traits that can be used on different UI elements. These let the user know additional details such as usage, behavior, or state. A UI element can have multiple traits associated with it. For example, let’s say you have a UISegmentedControl with multiple options. Since it is a button, it should have the button trait. The selected item should also have the selected trait. As a result, when the user focuses on the selected item, VoiceOver will announce it as both a “button” and “selected.”
Some of these accessibility traits are also used by the rotor to select different elements on the screen. If you’re unfamiliar with the rotor and how to use it, Getting Familiar with iOS VoiceOver’s Rotor provides a quick overview. With this example app, if you use the rotor to select “Headings” and then one-finger flick up and down, VoiceOver responds with, “Heading not found.” Even though the “Authentic Cowboy Hat” title is intended to be the heading for this screen, it’s not recognized as one, because the header trait is not set. To fix this, you can add a header accessibility trait on that label:
titleLabel.accessibilityTraits = [.header]
This marks the label as a header, which in turn allows the rotor to navigate to it when using the headings navigation setting. This setting also causes VoiceOver to announce “heading” after the content of the label.
In this application we want the user to know what it is they are rating. Since the image is not purely decorative, VoiceOver should be able to focus on it and provide a description. If you simply enable VoiceOver on the image, iOS will do its best to describe the image to the user. You can make the image accessible by adding:
productImageView.isAccessibilityElement = true
Now if we run the application again and ask it to read the page from the top, the image proves focusable! Hint: try a two-finger swipe up while VoiceOver is active, which activates “Read from Top.”
Notice that when VoiceOver focuses on the image it says “image, cowboy hat.” The spoken “image” is from the accessibilityTrait for the UIImageView, and the “cowboy hat” is the system trying to describe the image contents to the user. In this case, the image is pretty clear, so it does a good job figuring out what it is. To meaningfully leave a rating, though, the user needs more details about the style of cowboy hat. The spoken text can be changed by adding an accessibilityLabel to the image:
productImageView.accessibilityLabel = "Dark brown leather hat with embellishments"
Now the user has a better understanding of what’s in that UIImageView!
Last but not least, a VoiceOver user cannot interact with the star rating control on the screen. This is because it’s a UIStackView with a set of five UIImageViews. To make it even less accessible, the app is using a UITapGestureRecognizer to handle the user interaction with the stack. By default, UITapGestureRecognizers are not accessible and do not function when VoiceOver is turned on. While there are some instances where gesture recognizers can be used with VoiceOver, this particular implementation would benefit from a custom rotor.
UIStackViews aren’t focusable by default, so let’s begin by making it accessible:
ratingStackView.isAccessibilityElement = true
Now the element is selectable, but VoiceOver doesn’t say anything. It needs an accessibilityLabel that describes the current state. Assuming the currentRating variable contains the current star value, we can include that in the label:
// The rating goes from 0 to 4 but the user should hear 1 to 5
ratingStackView.accessibilityLabel = "Rating: (currentRating + 1) out of 5"
At this point, the user can’t really interact with the rating control besides focusing on it and hearing the current state. This is where we can add a custom rotor that allows the user to quickly flick up and down to change their rating of the item.
// The name of the rotor is the title in the rotor item selection and what the user hears
let ratingRotor = UIAccessibilityCustomRotor(name: "Rating Value") { [weak self] predicate -> UIAccessibilityCustomRotorItemResult? in
    guard let self = self else { return nil }

    // When the user flicks up we want to increase the rating and down is used to decrease while keeping it within bounds
    let isFlickUp = predicate.searchDirection == UIAccessibilityCustomRotor.Direction.previous
    let delta = isFlickUp ? +1 : -1
    rating = min(max(0, rating + delta), 4)

    // Handles the UI updates to fill in the stars
    self.setRating(value: rating)

    // Notifies the system that the layout for the rating stack view changed
    UIAccessibility.post(notification: .layoutChanged, argument: self.ratingStackView)

    return UIAccessibilityCustomRotorItemResult(targetElement: self.ratingStackView , targetRange: nil)
}
The code above creates a custom rotor that updates the rating up or down by 1 star with each flick up or down gesture respectively. The final step is to add this rotor to the element that we want it to work on:
ratingStackView.accessibilityCustomRotors = [ratingRotor]
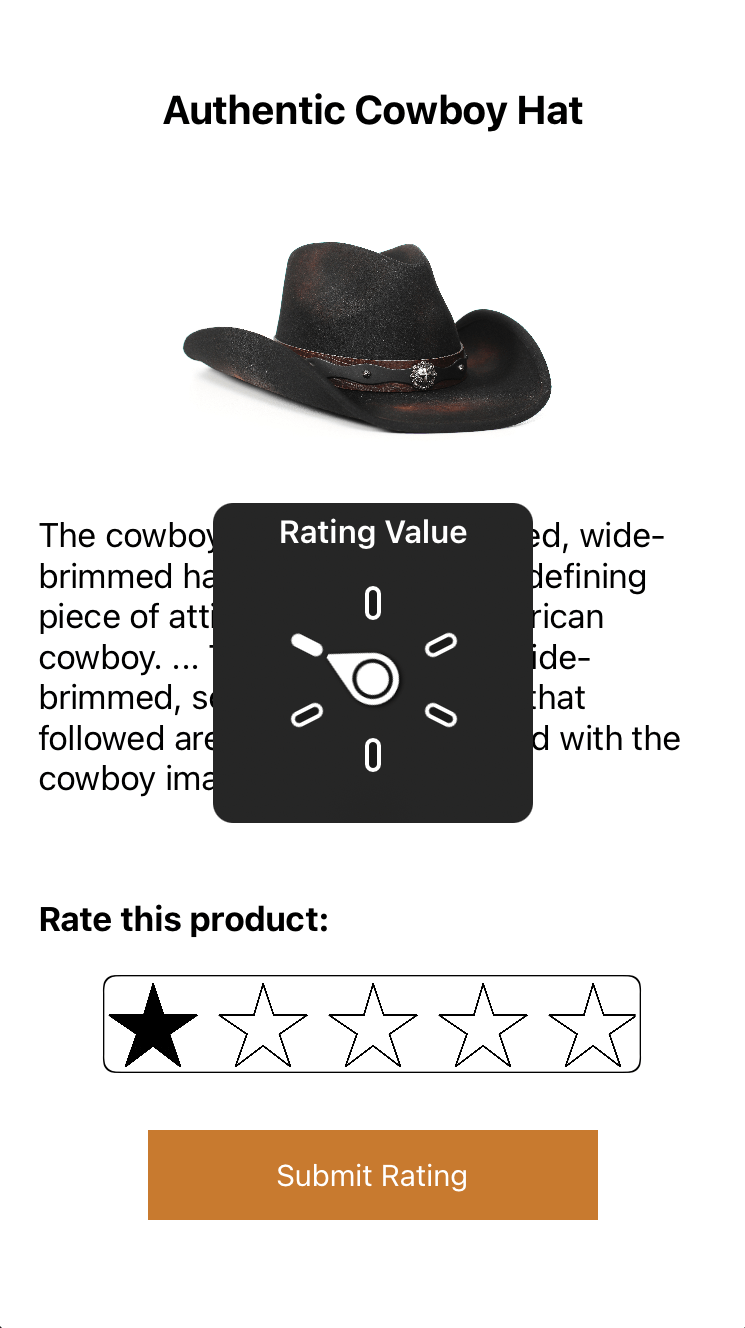
At this point the ratingStackView has a custom rotor called “Rating Value”. When the user focuses on the ratingStackView, VoiceOver automatically says, “Use the rotor to access Rating Value.” This hint lets the user know that there is a rating value option available in the rotor.
 The app now has a custom rotor! Custom rotors provide endless possibilities when making your app more accessible to VoiceOver users. All of your cool custom controls can easily be made accessible to everyone.
When stepping through the application with VoiceOver, the user can now interact with all of the items and perform the same functions as non-VoiceOver users!
This covers some of the basic settings and uses for VoiceOver functionality. VoiceOver is not just limited to the examples above but they provide a great starting point. Rather than adding accessibility to your app as an afterthought, adding it from the beginning of the app development process and designing with those users in mind makes a big impact on the usability of your implementation.
Suggested challenge: rotors are great for some applications, but this star control would also make sense treated as a slider. Update the code to use the adjustable trait and accessibility value instead of a custom rotor. Which do you find more usable?
Want to play around with the code? You can find the code from this post here.
A well-designed and thoughtful app experience makes people happy. Happy people make for loyal customers. The more loyal customers your application has, the happier...

Semantic HTML is what is used as the building blocks of a fully accessible web page. The following will demonstrate how two versions of...

Getting started with accessibility in your app may be intimidating at first, but there are some handy tools out there to get you started.