


Now Available React Programming: The Big Nerd Ranch Guide
Front-End ReactBased on our React Essentials course, this book uses hands-on examples to guide you step by step through building a starter app and a complete,...
Editor’s Note: The API used by this blog series is no longer available. As a result, you will not be able to run this application locally, but you can read the code and explanations to see how to build a robust real-world frontend app data layer.
This post is the third part of an 8-part series going in-depth into how to build a robust real-world frontend app data layer. See the previous parts here:
Starting in this post, we’ll connect our React/Redux app to a backend web service. This post will only focus on authentication, because it’s a big enough topic in itself. The following post will handle using that authenticated access to read and write data from the web service.
We won’t be building the backend as part of this book; we’ll use an existing backend we’ve set up, sandboxapi.bignerdranch.com. Go there now and create a free account. This will allow you to create records without stepping on anyone else’s toes.
sandboxapi uses a modified form of the OAuth2 Password Grant flow for authentication, and follows the JSON:API specification for data transfer. The principles in this book aren’t specific to either of these approaches; they should work with very little change for any kind of password-based authentication and web service, and more broadly for other kinds of backends.
If you like, you can download the app as of the end of the post.
When setting up authentication for your backend, one important decision is how you’ll store your access token so it’s available when the user reloads the page. The answer isn’t totally clear.
One option is to store the token using the browser’s Local Storage API. This makes it easy to access from your JavaScript code, but it also makes the token vulnerable to Cross-Site Scripting (XSS) attacks, where a malicious user is able to execute their own JavaScript code on your domain and retrieve other users’ tokens.
Another option is to store the access token in a browser cookie with HttpOnly set, so it’s not accessible from JavaScript. This prevents XSS attacks, but may make your app vulnerable to Cross-Site Request Forgery (CSRF) attacks, because the cookie is automatically sent on any request to the API. CSRF can be mitigated with a combination of checking Origin and Referer headers and using a newer SameSite=strict flag, so cookies are generally considered the safer option. To learn more, check out the article “Where to Store Tokens” by Auth0.
Because the cookie-based approach has some advantages, we’ve set up sandboxapi to return your access token in a cookie. We’ll see below how to work with it.
For sending our web requests we’ll use the Axios library, an HTTP client that is simple and nicely configurable. Add it to the project:
$ yarn add axios
Next, it’s a common pattern to configure your Axios instance in an api module. Create src/store/api.js and add the following:
import axios from 'axios';

const api = axios.create({
  baseURL: 'https://sandboxapi.bignerdranch.com',
  withCredentials: true,
  headers: {
    'Content-Type': 'application/vnd.api+json',
  },
});

export default api;
The withCredentials property indicates to Axios that it should send the cookie for the API domain along with the request.
The content type application/vnd.api+json is the content type required by the JSON:API spec. Our server will check for this content type for requests that have a body (in this guide, just POSTs), and will return an error if the content type doesn’t match.
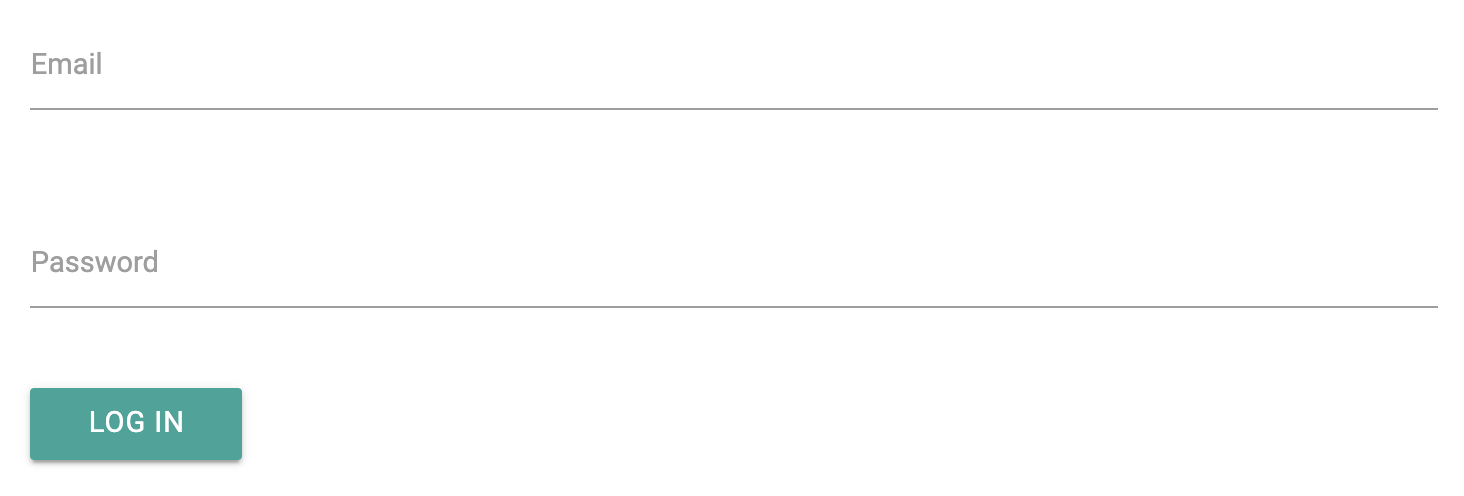
Before we can get into sending store requests to read or write our data, we need to log in. Because our app won’t offer any functionality when you aren’t logged in, we’ll prompt the user with a login form right away. Once they log in, we’ll give them access to the rest of the app.
We’ll implement this with two different components, so let’s create a components/Auth folder. Underneath it, let’s start with the simple login form. Create LoginForm.js and add the following:
import React, { useState } from 'react';
import { get } from 'lodash-es';
import {
  Button,
  Col,
  Input,
  Row,
} from 'react-materialize';
import api from 'store/api';

const LoginForm = ({ onLoginSuccess }) => {
  const [email, setEmail] = useState('');
  const [password, setPassword] = useState('');
  const [error, setError] = useState(null);

  const handleChange = (setField) => (event) => {
    setField(event.target.value);
    setError(false);
  }

  const logIn = (event) => {

  }

  return (
    <form onSubmit={logIn}>
      {error ? <p>{error}</p> : null}
      <Row>
        <Input
          label="Email"
          value={email}
          onChange={handleChange(setEmail)}
          s={12}
        />
      </Row>
      <Row>
        <Input
          label="Password"
          type="password"
          value={password}
          onChange={handleChange(setPassword)}
          s={12}
        />
      </Row>
      <Row>
        <Col>
          <Button>Log In</Button>
        </Col>
      </Row>
    </form>
  );
};

export default LoginForm;
So far this is just a simple form with two controlled inputs. Next, let’s start filling in the implementation for the logIn function:logIn = (event) => {
  event.preventDefault();

  api.post('/oauth/token', {
    grant_type: 'password',
    username: email,
    password,
  }).then(() => {

  }).catch((error) => {

  });
}
We retrieve the email and the password from the state, then we use our API client to send a POST request to the /oauth/token endpoint. This checks a username and password and gives us back an access token. It uses the OAuth2 Password Grant standard (modified, as we’ll see, to return the access token as a cookie), so in addition to the username and password fields, we pass in a required grant_type property set to password.
Next, let’s fill in the then function:
api.post('/oauth/token', {
  grant_type: 'password',
  username: email,
  password,
}).then(() => {
  onLoginSuccess();
}).catch((error) => {

});
We simply call an onLoginSuccess function. We don’t need to store or pass the token; we don’t even have access to it from JavaScript because it’s stored in an HttpOnly cookie.
Finally, let’s fill in the catch function:
api.post('/oauth/token', {
  grant_type: 'password',
  username: email,
  password,
}).then(() => {
  onLoginSuccess();
}).catch((error) => {
  const message = get(
    error,
    'response.data.error_description',
    'An error occurred while logging in. Please try again.',
  );
  setError(message);
});
We use Lodash’s get() function, which we imported at the top of the file, to dig a few levels deep, into an error.response.data.error_description property. Any of those properties might be missing, because, for example, the catch function will catch any other JavaScript errors as well. The third argument to get() is a default value. The net result is this: if the error has a response.data.error_description property, we display that as the error message; otherwise, we display a generic error message. Our server is configured to send the error “Invalid username or password” if the user enters incorrect data. If you have access to your server and can configure it to send back a human-readable message, that allows your app to be more flexible to report different kinds of error.
Now we have a login form, but how will we handle showing and hiding it? We’ll use a separate Auth component for this. Create components/Auth/index.js and add the following:
import React, { useState } from 'react';
import LoginForm from './LoginForm';

const Auth = ({ children }) => {
  const [loggedIn, setLoggedIn] = useState(false);

  const handleLoginSuccess = () => {
    setLoggedIn(true);
  }

  if (loggedIn) {
    return children;
  } else {
    return <LoginForm onLoginSuccess={handleLoginSuccess} />;
  }
}

export default Auth;
The responsibility of the Auth component is to display one of two states. If the user is not logged in, the LoginForm is displayed. If the user is logged in, the component’s children are rendered.
How do we record whether the user is logged in or not? We default the user to not logged in. We also pass a handleLoginSuccess function to the LoginForm component. When that function is called, it sets the loggedIn flag to true, which will cause the rest of our app to be shown.
Now we just need to add the Auth component to App.js:
 import { Col, Row } from 'react-materialize';
+import Auth from 'components/Auth';
 import GameList from 'components/GameList';


 const App = () => (
   <Provider store={store}>
     <Row>
       <Col s={12} m={10} l={8} offset="m1 l2">
-        <GameList />
+        <Auth>
+          <GameList />
+        </Auth>
       </Col>
     </Row>
   </Provider>
With this, logging in should work in our app. Stop and restart the server if you haven’t already, and you should see the login form.
Try entering an incorrect username and password. In the Network tab of your browser dev tools you should see a request go out. And you should see the error message “Invalid username or password” displayed. Next, in the Chrome Dev Tools Network tab, select the Offline checkbox.

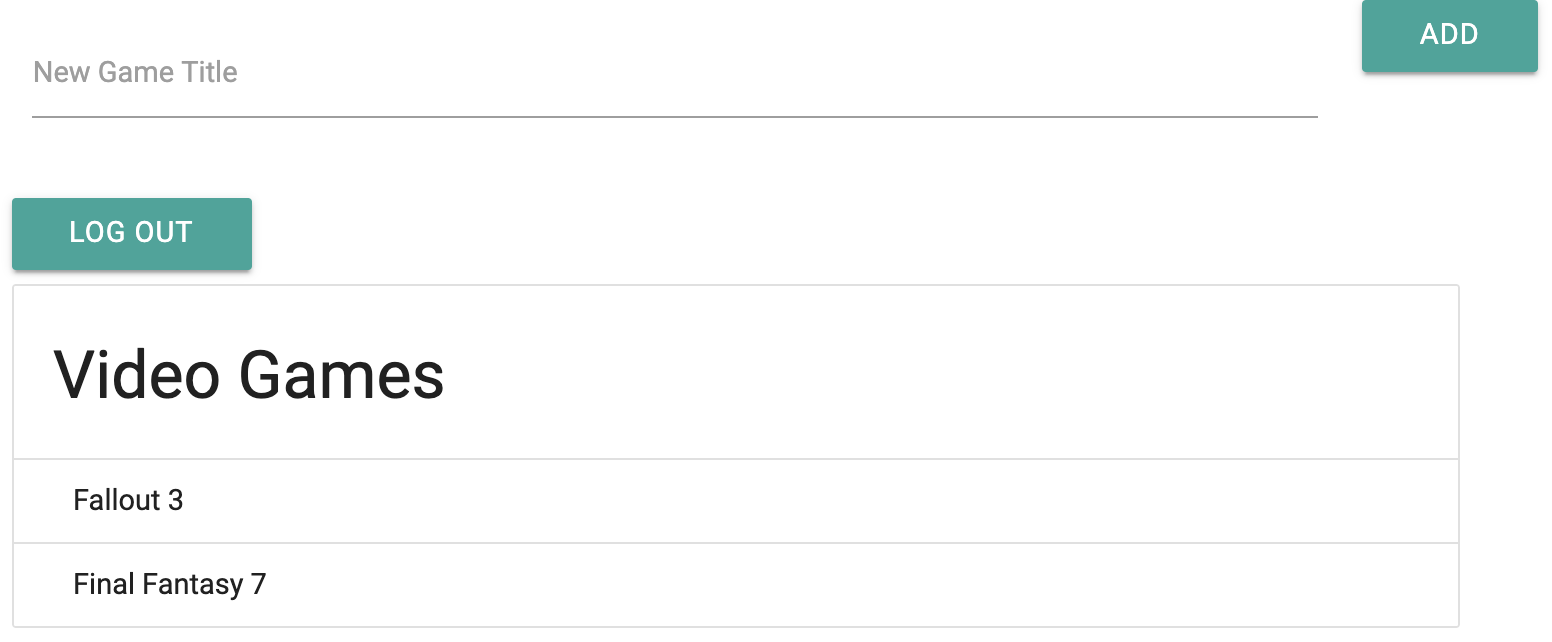
Now when you attempt to submit the form, you should see the error “An error occurred while logging in. Please try again.” Now, uncheck “Offline” and enter your real username and password. You should see the list of records displayed. Great!
You’ll notice that when you reload the app you’re prompted to log in again. This isn’t a great user experience. The user’s access code is stored in a cookie, and there is no way for the app to check for the presence of that cookie, because it’s HttpOnly and not accessible to JavaScript for security.
Instead, we should store a flag indicating whether or not the UI should consider the user logged in. We will eventually have lots more Redux data to persist as well, so let’s go ahead and store the login state in Redux and use Redux Persist to persist it.
(How can you handle persisting data if you’re working in a framework or platform other than Redux? Other state management libraries like MobX and Vuex also have packages to automatically persist their data to local storage. If you can’t find one, you may need to write the persistence yourself, and that’s outside the scope of this tutorial. The goal is just to persist all state changes to storage in real time as they’re made to the in-memory data, so it can be restored the next time the app is used.)
Start by adding the redux-persist package:
$ yarn add redux-persist
Update store/index.js to hook Redux Persist into your store as described in the Redux Persist readme:
 import { createStore } from 'redux';
 import { devToolsEnhancer } from 'redux-devtools-extension';
+import { persistStore, persistReducer } from 'redux-persist';
+import storage from 'redux-persist/lib/storage';
 import rootReducer from './reducers';

+const persistConfig = {
+  key: 'video-games',
+  storage,
+};
+
+const persistedReducer = persistReducer(persistConfig, rootReducer);
+
 const store = createStore(
-  rootReducer,
+  persistedReducer,
   devToolsEnhancer(),
 );
+
+const persistor = persistStore(store);

-export default store;
+export { store, persistor };
First, we set up the persistConfig, which includes the key to store our data under, and the storage to use. The storage we pass is redux-persist/lib/storage, which defaults to using the browser’s localStorage. This isn’t a security concern because we aren’t storing the user’s token in local storage, only a flag indicating that they are logged in. Next, we call persistReducer to wrap our rootReducer with persistence logic.
Next, we create a persistor by passing the store to persistStore(). In addition to making the store available to the rest of the app, we now expose the new persistor as well. We need to update our App to wait for the persistor to finish restoring the data before it displays our app. Redux Persist provides the PersistGate component for this purpose.
import React from 'react';
 import { Provider } from 'react-redux';
+import { PersistGate } from 'redux-persist/integration/react';
-import store from 'store';
+import { store, persistor } from 'store';
 import { Col, Row } from 'react-materialize';
 import Auth from 'components/Auth';
 import GameList from 'components/GameList';

 const App = () => (
   <Provider store={store}>
-    <Row>
-      <Col s={12} m={10} l={8} offset="m1 l2">
-        <Auth>
-          <GameList />
-        </Auth>
-      </Col>
-    </Row>
+    <PersistGate loading={null} persistor={persistor}>
+      <Row>
+        <Col s={12} m={10} l={8} offset="m1 l2">
+          <Auth>
+            <GameList />
+          </Auth>
+        </Col>
+      </Row>
+    </PersistGate>
   </Provider>
 );
Inside the Provider but outside any other components, we wrap our app in the PersistGate. We pass the returned persistor to it.
With this, our app should now be persisting our Redux state. Let’s inspect the data that’s being stored. In the Chrome developer tools, choose the Application tab, then click Storage > Local Storage > http://localhost:3000. You should see a key named persist:video-games. Click on it and you should see a simple version of your Redux store’s state.

Now we need to add the logged-in state to our Redux store. We’ll add it into a new reducer group, just like we created a games reducer group before. Create a store/login folder. Then create a store/login/actions.js file and add an action and action creator pair to log in and to log out:
export const LOG_IN = 'LOG_IN';
export const LOG_OUT = 'LOG_OUT';

export const logIn = () => {
  return {
    type: LOG_IN,
  };
};

export const logOut = () => {
  return {
    type: LOG_OUT,
  };
};
Next, create store/login/reducers.js and add a loggedIn reducer:import { combineReducers } from 'redux';
import {
  LOG_IN,
  LOG_OUT,
} from './actions';

export function loggedIn(state = false, action) {
  switch (action.type) {
    case LOG_IN:
      return true;
    case LOG_OUT:
      return false;
    default:
      return state;
  }
}

export default combineReducers({
  loggedIn,
});
The loggedIn state starts as false, it’s set to true upon login, and false upon log out.
Now we add the login reducers group to our main reducer in store/reducers.js:
import { combineReducers } from 'redux';
+import login from './login/reducers';
 import games from './games/reducers';

 export default combineReducers({
+  login,
   games,
 });
Now we need to hook this state and action creator up to our app. We’ll add it to Auth/index.js. This time, we’ll create the Redux container in the same file:
-import React, { useState } from 'react';
+import React from 'react';
+import { connect } from 'react-redux';
 import LoginForm from './LoginForm';
+import {
+  logIn,
+} from 'store/login/actions';

-const Auth = ({ children }) => {
+const Auth = ({ loggedIn, logIn, children }) => {
-  const [loggedIn, setLoggedIn] = useState(false);
-
-  const handleLoginSuccess = () => {
-    setLoggedIn(true);
-  }
-
   if (loggedIn) {
     return children;
   } else {
-    return <LoginForm onLoginSuccess={handleLoginSuccess} />;
+    return <LoginForm onLoginSuccess={logIn} />;
   }
 }
+
+function mapStateToProps(state) {
+  return {
+    loggedIn: state.login.loggedIn,
+  };
+}
+
+const mapDispatchToProps = {
+  logIn,
+};
+
+export default connect(mapStateToProps, mapDispatchToProps)(Auth);
We update the Auth component to pull the loggedIn state from Redux instead of from component state. We also remove the handleLoginSuccess method, because all we need to do now is dispatch the action creator logIn.
Run the app and log in. Then reload the app. You’re kept logged in! Now we need a way to log out too, though. Add it to the GameList Redux container:
import { pick } from 'lodash-es';
 import {
   addGame,
 } from 'store/games/actions';
+import {
+  logOut,
+} from 'store/login/actions';
 import GameList from './GameList';
...
 const mapDispatchToProps = {
   addGame,
+  logOut,
 };
And to the GameList itself:
import React, { Component } from 'react';
 import {
+  Button,
   Collection,
   CollectionItem,
 } from 'react-materialize';
...
 const GameList = ({
   games,
   addGame,
+  logOut,
 }) => {
   return <div>
     <AddGameForm onAddGame={addGame} />
+    <Button onClick={logOut}>
+      Log Out
+    </Button>
     <Collection header="Video Games">
       { games.map((game) => (
         <CollectionItem key={game}>{game}</CollectionItem>
Now reload the app and you should be able to log out and back in.
With this, our authentication setup is working. We’re able to provide a username and password and receive back an access token as a cookie. Because of the configuration of the cookie headers, we have good protection from XSS and CSRF attacks. Our app is also keeping track of whether we’re logged in, and will remember this between page loads using a flag in our Redux store that’s persisted to local storage.
We took a little longer than is often the case on frontend projects to ensure that our security setup is as good as we can reasonably make it. Now that that’s set, we’re ready to use this authenticated access to read and write data from the server.
Based on our React Essentials course, this book uses hands-on examples to guide you step by step through building a starter app and a complete,...
Svelte is a great front-end Javascript framework that offers a unique approach to the complexity of front-end systems. It claims to differentiate itself from...

Large organizations with multiple software development departments may find themselves supporting multiple web frameworks across the organization. This can make it challenging to keep...